Materials
usdtweak supports assigning USD materials to prims through the Stage Property Editor. This page covers how to bind materials and manage material assignments.
Assigning a material
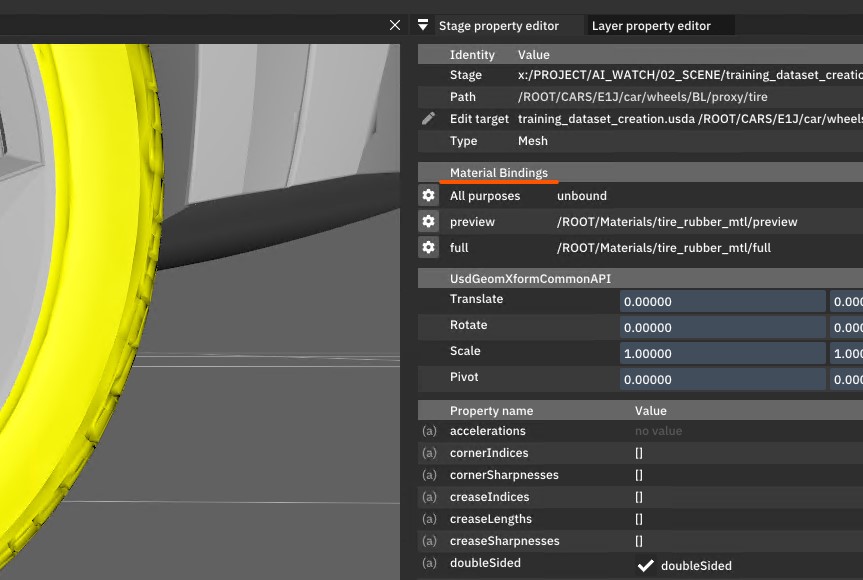
The easiest way to assign a material to a prim is through the Stage Property Editor. When you select a prim that supports material binding, you will see a Material binding section displaying the current bindings per purpose.
Selecting a material
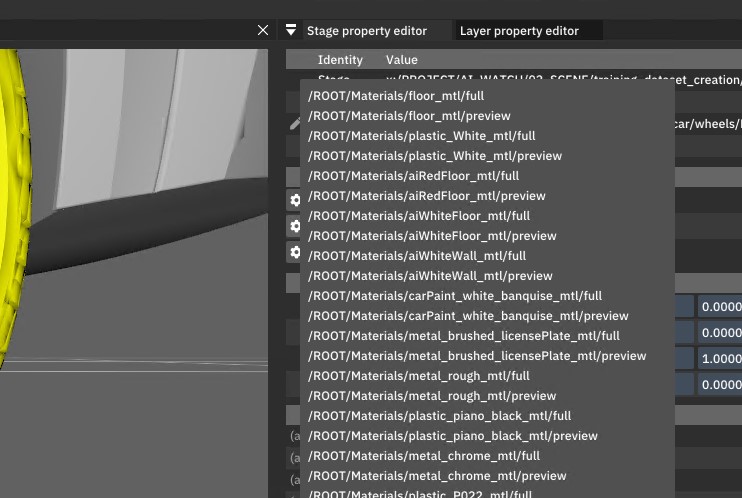
Click the cog icon next to a binding purpose to display a list of all materials available in the current stage. Select a material from the list to assign it to the prim for that purpose.
Binding purposes
USD supports multiple material binding purposes. usdtweak displays these in the Material binding section:
| Purpose | Description |
|---|---|
| Full | The primary material binding used for final rendering. |
| Preview | A simpler material intended for interactive preview rendering. |
You can assign different materials for different purposes, allowing your assets to have both a lightweight preview material and a full-quality render material.
How material binding works
Material binding in USD uses the UsdShadeMaterialBindingAPI. When you assign a material through the Stage Property Editor:
- A material binding relationship is authored on the selected prim.
- The binding targets the selected material prim's path.
- The binding is authored on the current edit target layer.
Material bindings are written to the current edit target layer. If you want the binding in a specific layer, set the edit target before assigning the material. See Edit Target for details.
Removing a material binding
To remove a material binding, you can clear the binding path in the Material binding section of the Stage Property Editor, or remove the binding relationship through the Layer Property Editor.